Testing a solar panel is crucial for ensuring its efficiency, longevity, and performance. Whether you’re a DIY enthusiast, a homeowner considering solar installation, or a professional in the solar industry, understanding how to test a solar panel can save you time, money, and headaches.
Understanding Solar Panels
Types of Solar Panels
Solar panels come in various types, each with distinct characteristics and advantages. Understanding these differences can help you choose the best panel for your needs.
- Monocrystalline Solar Panels: These panels are made from a single, continuous crystal structure. They are known for their high efficiency, typically ranging from 15% to 20%, and their sleek, black appearance. They are space-efficient and perform well even in low-light conditions, making them ideal for residential and commercial applications where space is limited.
- Polycrystalline Solar Panels: Made from silicon crystals melted together, these panels are less efficient than monocrystalline panels, with efficiency rates between 13% and 16%. They have a bluish hue and are usually less expensive, making them a cost-effective choice for many homeowners.
- Thin-Film Solar Panels: These are made by depositing photovoltaic material onto a substrate. Thin-film panels are lightweight and flexible, making them suitable for a variety of applications, including building-integrated photovoltaics (BIPV). However, they have lower efficiency (around 10% to 12%) and require more space to generate the same amount of electricity as monocrystalline or polycrystalline panels.
- Building-Integrated Photovoltaics (BIPV): These panels are integrated into building materials, such as windows or roofing tiles, making them an aesthetic option for architecture. They come in various forms, including solar shingles and solar glass.
Components of a Solar Panel
Understanding the key components of a solar panel is crucial for testing and maintenance.
- Photovoltaic Cells: The heart of the panel, these cells convert sunlight into electricity through the photovoltaic effect. They are typically made of silicon and are arranged in a grid-like pattern.
- Glass Layer: This layer protects the photovoltaic cells from environmental damage while allowing sunlight to pass through. It is usually tempered glass, which is durable and weather-resistant.
- Backing Material: This layer provides structural support and protects the cells from moisture and physical damage. It is often made of a polymer or a metallic layer.
- Frame: The frame holds the solar panel together and mounts it onto structures. It is typically made of aluminum, which is lightweight and resistant to corrosion.
- Junction Box: Located at the back of the panel, the junction box houses the electrical connections and diodes. It ensures safe and efficient electrical flow from the cells to the inverter.
Tools Needed for Testing
Testing solar panels requires specific tools to measure and analyze their performance accurately.
Multimeter
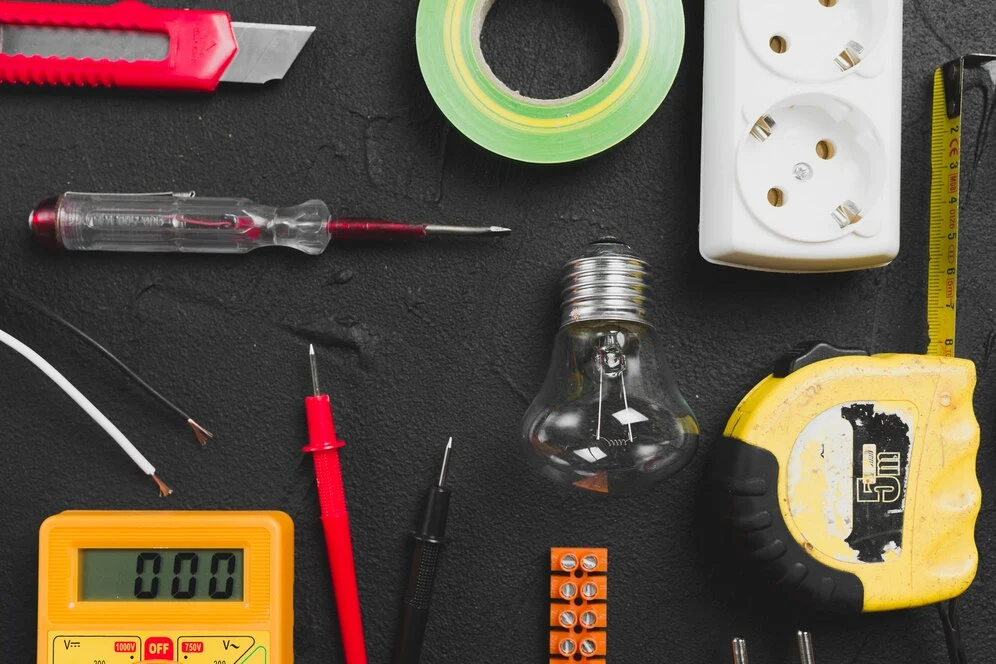
A multimeter is an essential tool for measuring electrical parameters such as voltage, current, and resistance. It’s crucial for diagnosing the electrical output of solar panels.
- Functionality: Use the multimeter to measure the open-circuit voltage (Voc) and short-circuit current (Isc). Set the multimeter to the appropriate voltage and current ranges before connecting it to the panel’s terminals.
- How to Use: Connect the multimeter probes to the positive and negative terminals of the panel. Read the voltage and current values displayed. Compare these values with the panel’s specifications to check for any discrepancies.
Irradiance Meter
An irradiance meter measures the intensity of sunlight hitting the solar panel. It’s essential for determining the panel’s performance under different lighting conditions.
- Functionality: The irradiance meter provides readings in watts per square meter (W/m²), indicating the amount of sunlight energy available.
- How to Use: Place the meter on the panel’s surface to measure the irradiance. Ensure the meter is calibrated correctly to obtain accurate readings. Use this data to calculate the panel’s efficiency and performance.
Solar Simulator
A solar simulator mimics sunlight conditions and is used to test solar panels under controlled conditions. It ensures that the panel is tested at standard test conditions (STC).
- Functionality: The simulator produces a specific spectrum of light that mimics the sun’s energy. It includes adjustable parameters such as irradiance level and temperature.
- How to Use: Position the panel under the simulator and adjust the settings to match the standard test conditions (1000 W/m² irradiance, 25°C temperature). Measure the panel’s electrical output to assess its performance.
Temperature Sensor
Temperature affects the efficiency of solar panels. A temperature sensor measures the panel’s surface temperature, helping to understand its thermal performance.
- Functionality: The sensor provides real-time temperature readings, crucial for evaluating how heat impacts the panel’s efficiency.
- How to Use: Attach the temperature sensor to the panel’s surface, preferably at the hottest spot. Monitor the temperature during testing and record the data. Use this information to analyze the temperature’s effect on the panel’s performance.
Safety Precautions
Ensuring safety during solar panel testing is paramount to prevent accidents and injuries.
Personal Safety
Personal safety should always be a priority when working with solar panels.
- Protective Gear: Wear safety glasses, gloves, and sturdy footwear to protect against electrical hazards and physical injuries.
- Safe Handling: Avoid contact with live wires and components. Use insulated tools and equipment to minimize the risk of electric shock.
- Ventilation: Work in a well-ventilated area, especially when using equipment that generates heat or gases.
Equipment Safety
Proper handling and maintenance of testing equipment are essential for safe and accurate testing.
- Regular Inspection: Check all tools and equipment for damage or wear before use. Replace any damaged components immediately.
- Correct Usage: Follow the manufacturer’s instructions for operating each tool. Ensure all connections are secure and correctly configured.
- Avoid Overloading: Do not exceed the voltage and current ratings of your multimeter and other testing equipment to prevent damage and ensure safety.
How to Test a Solar Panel?
Selecting the Right Solar Panel
Choosing the correct solar panel for testing is crucial. Factors to consider include the panel’s type, age, and condition.
- Type: Determine whether you are testing monocrystalline, polycrystalline, or thin-film panels. Each type has different characteristics and efficiency levels.
- Age and Condition: Select panels that are representative of the ones you intend to test. Check for any signs of wear, damage, or degradation. Older panels might show reduced performance.
- Purpose: Define the purpose of the test. Are you testing for efficiency, output, or potential faults? This will help you choose the appropriate panel and testing equipment.
Setting Up the Testing Environment
Creating a suitable environment is essential for accurate testing.
- Location: Choose a location with minimal shading and consistent sunlight. An open area with clear skies is ideal.
- Stable Surface: Ensure the panel is mounted on a stable, level surface to avoid any tilting or movement during the test.
- Weather Conditions: Check the weather forecast. Ideal testing conditions are typically on clear, sunny days. Avoid testing during cloudy or rainy weather to ensure accurate results.
Visual Inspection
Checking for Physical Damage
Before diving into electrical testing, perform a visual inspection to identify any physical damage.
- Cracks and Breaks: Look for cracks in the glass or broken cells. Even small cracks can significantly impact the panel’s performance.
- Discoloration: Check for discoloration or burn marks on the cells, which could indicate overheating or electrical faults.
- Debris and Dirt: Remove any dirt, leaves, or debris that could obstruct sunlight. Clean the panel surface gently using water and a soft cloth.
Inspecting Wiring and Connections
Secure and intact wiring is essential for the panel’s functionality.
- Connections: Inspect all wiring connections for tightness and corrosion. Loose or corroded connections can lead to power loss or short circuits.
- Cable Condition: Check the cables for cuts, wear, or fraying. Replace any damaged cables to ensure safe and efficient electrical flow.
- Grounding: Verify that the panel is properly grounded. Proper grounding is crucial for safety and to prevent electrical faults.
Measuring Voltage and Current
Using a Multimeter
A multimeter is a vital tool for measuring the electrical output of the solar panel.
- Setting Up: Set the multimeter to the appropriate mode for voltage (V) and current (A). Ensure you select a range that matches the expected output of the panel.
- Connection: Connect the multimeter probes to the positive and negative terminals of the solar panel. Start with the voltage measurement, then switch to current measurement.
- Reading Values: Note the open-circuit voltage (Voc) and short-circuit current (Isc). These readings are crucial for evaluating the panel’s performance.
Understanding Voltage and Current Readings
Interpreting the readings correctly is essential for diagnosing the panel’s condition.
- Voltage (Voc): This is the maximum voltage the panel produces when there is no load connected. Compare this value with the panel’s specifications.
- Current (Isc): This is the maximum current the panel produces when its terminals are short-circuited. Ensure the measured Isc matches the expected value.
- Performance Check: Calculate the power output using the formula P=V×IP = V \times IP=V×I. Compare this with the manufacturer’s rated power to assess performance.
Testing the Efficiency
Using a Solar Simulator
A solar simulator replicates sunlight, providing a controlled environment for testing panel efficiency.
- Setup: Place the panel under the solar simulator. Adjust the irradiance level to 1000 W/m², which is the standard test condition (STC).
- Measurement: Use the simulator’s control panel to set the intensity and wavelength of light. Ensure the temperature is also set to 25°C (77°F).
- Data Collection: Measure the panel’s output voltage, current, and power. Record these values for efficiency calculation.
Calculating the Efficiency
Efficiency is a critical metric, representing how well the panel converts sunlight into electricity.
- Formula: Efficiency (%) = (Electrical OutputSolar Input)×100%\left(\frac{\text{Electrical Output}}{\text{Solar Input}}\right) \times 100\%(Solar InputElectrical Output)×100%.
- Input Data: Use the irradiance meter to measure the solar input (in W/m²). Combine this with the electrical output data from the solar simulator.
- Analysis: Compare the calculated efficiency with the panel’s rated efficiency. Any significant deviation might indicate issues such as shading, dirt, or panel damage.

Assessing Power Output
Performing an Irradiance Test
An irradiance test measures the sunlight intensity on the panel’s surface, crucial for performance assessment.
- Setup: Place the irradiance meter directly above the panel. Ensure it is perpendicular to the sun’s rays for accurate measurements.
- Measurement: Record the irradiance value in watts per square meter (W/m²). This data is essential for calculating the panel’s power output.
- Calculation: Use the formula P=Irradiance×Area×EfficiencyP = \text{Irradiance} \times \text{Area} \times \text{Efficiency}P=Irradiance×Area×Efficiency to estimate the power output. Compare this with the panel’s rated power.
Comparing with Manufacturer Specifications
Comparing test results with the manufacturer’s specifications helps identify performance issues.
- Rated Power: Check the panel’s rated power (typically listed in watts) and compare it with the measured output.
- Efficiency Benchmark: Compare the measured efficiency with the panel’s rated efficiency. Significant discrepancies might indicate degradation or faults.
- Visual Inspection Correlation: Cross-reference visual inspection findings (e.g., cracks, dirt) with performance data to pinpoint potential causes of underperformance.
Temperature Testing
Using a Temperature Sensor
Temperature significantly affects solar panel efficiency. A temperature sensor helps monitor this impact.
- Setup: Attach the temperature sensor to the panel’s surface, preferably at the hottest spot. Ensure good contact for accurate readings.
- Measurement: Record the temperature during the test. Note any fluctuations that could affect the panel’s performance.
- Data Logging: Use a data logger to track temperature changes over time, correlating them with power output variations.
Understanding the Impact of Temperature on Performance
Temperature directly influences the efficiency of solar panels.
- Voltage Drop: Higher temperatures typically reduce the voltage output of the panel. This is due to the negative temperature coefficient of silicon.
- Efficiency Loss: For every degree Celsius increase in temperature, the panel’s efficiency usually decreases. Understanding this relationship helps in assessing performance under varying conditions.
- Optimal Temperature Range: Most panels perform best at around 25°C (77°F). Deviations from this temperature range can significantly affect efficiency.
Conclusion
Regularly testing your solar panels is essential to ensure they operate at peak efficiency and maintain their longevity. By understanding the different types of panels, using the right tools, conducting thorough visual inspections, and performing detailed tests for voltage, current, efficiency, and temperature, you can detect and address issues early. This proactive approach will help you maximize your solar investment, providing sustainable and cost-effective energy for years to come.
FAQs
What tools are essential for testing a solar panel?
Essential tools include a multimeter for measuring voltage and current, an irradiance meter to measure sunlight intensity, a solar simulator to replicate sunlight conditions, and a temperature sensor to monitor the panel’s surface temperature.
How often should solar panels be tested?
Solar panels should be tested at least once a year. However, more frequent testing may be needed if the panels are older, located in dusty areas, or if you notice a drop in performance.
What is the ideal temperature for solar panel performance?
The ideal temperature for solar panel performance is around 25°C (77°F). At this temperature, panels operate most efficiently.

